BUTCHER GUIDE: HOW TO TIE A BUTCHER KNOT
Saturday, March 19, 2016
So here it is, the butcher knot, are you ready to take it on?
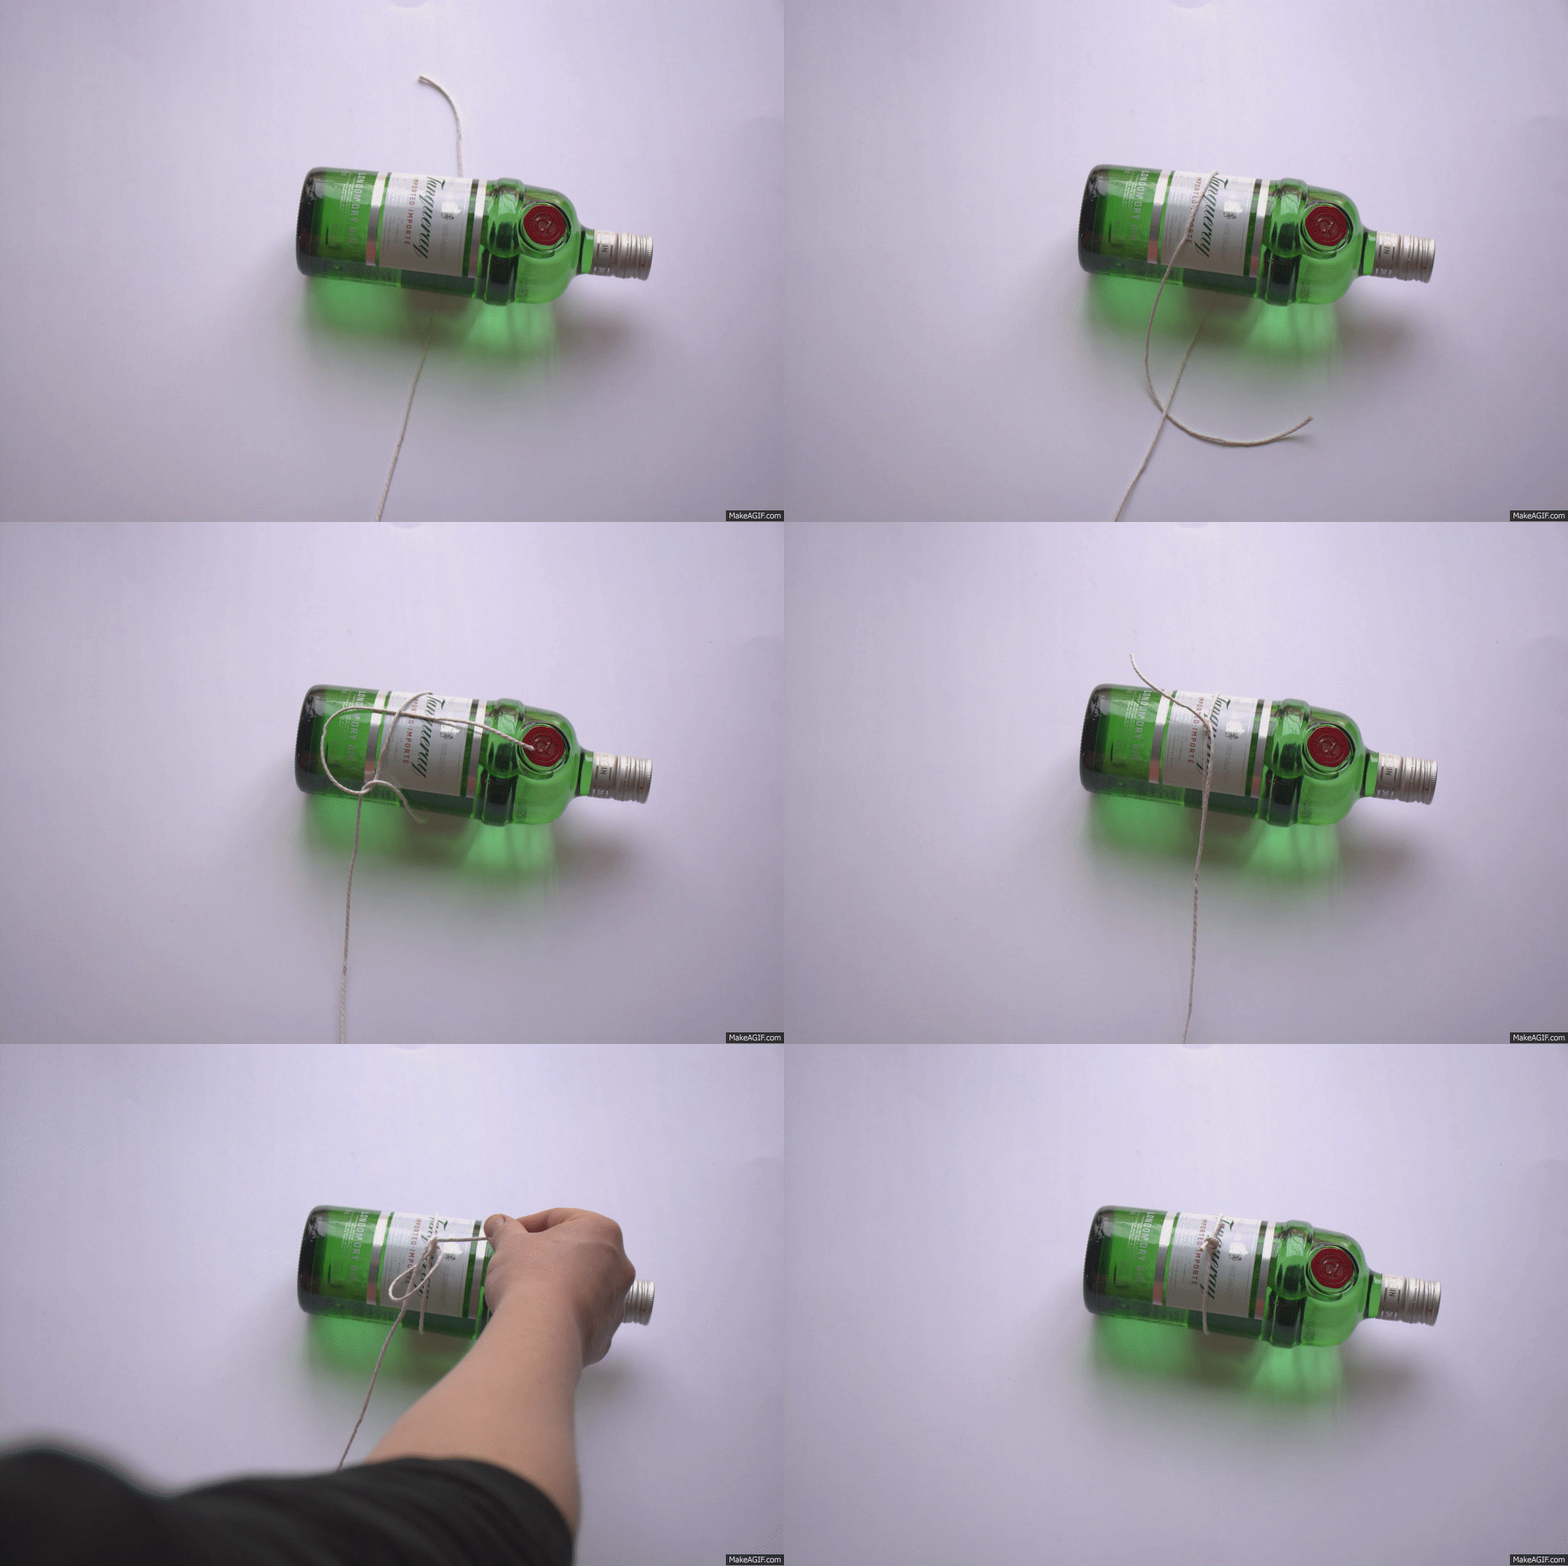
There are photos for each step of the knot and yes, I used a gin bottle not a piece of meat........
1. With the piece of meat parallel to you bring the butcher string under the meat. I would advise that the ball of string is in a plastic container on the floor- keeping it away from the meat keeps the ball clean and dry.2. Bring the end of the string back towards you over the top and keep it on the left hand side of the bottom string.
3. Bring the end of the string under the bottom string.
4. Take the end of the string up towards the top left.
5. The end of the string now goes underneath the top string which forms a loop- make sure the loop is big enough to bring the string through in the next step.
6. Bring the end of the string through the loop.
7. Gentle bring the knot together by pulling on the end of the string. Do not tighten it too much as it needs to slip along the bottom string to tighten on the meat in the next step.
8. To tighten the knot hold the bottom string and pull towards yourself. I find it easier to take the knot away from me over the top of the meat and then pull it towards me. This allows me to keep my knots in a perfect line along the top of the meat- you really don't need to worry about this until you have done so many of these knots that straight lines matter!
The tightness of the string all depends on what you are rolling. If you are stuffing the meat with something you can apply less pressure and tighten the string less so you don't push out the stuffing. Just aim to keep the meat at an even thickness.
9. We now have to secure the knot. Take the bottom string and make a loop around your finger and thumb. Grab the top string (the loose end sticking up from the knot), and drop the loop over the top.
10. Hold the bottom string and the top and tighten the securing knot.
11. Trim the top and bottom strings to leave two neat ends.
Repeat the process along the whole length of the meat. I usually leave about and inch between my strings but you can put in as many as you think you need to keep the joint of meat secure and even.
In case you are wondering why butchers use string, it's like magic! When we remove bones, which gives meat structure to hold its shape, adding string gives us the ability to give back it's shape, which allows you to cook it evenly and makes it easier to carve once cooked. See, magic!
Coming next in my butcher series is trussing a chicken. Trust me it's not as rude as it sounds!


2 comments
Thank you , thank you , thank you , that said I'm not sure I can do it without you shouting in my lug hole .
ReplyDeleteGet practicing and I can always shout at you on skype!
DeleteTell me what you're thinking, I promise I don't bite!